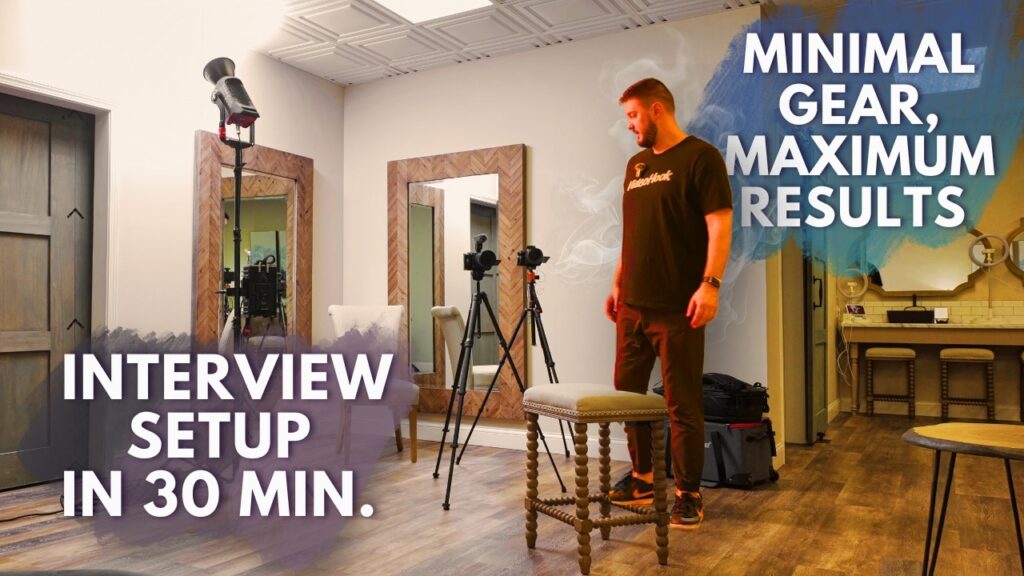
Most people think a clean, professional looking interview takes a half day of fiddling with stands, cables, and lights. It does not. I have shot plenty of interviews where the whole setup, from walking in the door to rolling on the first question, takes less than 30 minutes. The video above is a behind the scenes look at exactly that.
The trick is not buying more gear. It is having a repeatable order of operations so you are not making creative decisions and technical decisions at the same time. I do the same handful of steps every shoot, in the same sequence, and that is what keeps it fast.
Here is the workflow I walk through in the video, broken down so you can copy it on your next interview.
Pick the spot before you unpack anything
The single biggest time saver is choosing your location first and committing to it. I walk the room and look for two things: a background with some depth so the subject is not glued to a flat wall, and a window or a place I can put my key light without it fighting the room. Once I find that spot, I do not second guess it. Every minute you spend wandering around looking for the perfect corner is a minute you are not shooting.
I look for these things when I scout a quick interview space:
- A background with separation, so the subject is not pressed against the wall
- Control over the light, meaning I can kill or shape whatever is already there
- A quiet enough space, away from HVAC vents, hallways, and humming fridges
- Room to place a key light at roughly a 45 degree angle to the subject
Set the cameras and frame first
I shoot interviews on two cameras, a Sony FX3 as my main and an FX30 as my second angle. Getting two angles up front means I can cut around pauses and mistakes in the edit without the footage feeling jumpy. The main camera goes dead center on the subject’s eyeline for the wider, cleaner shot, and the second camera sits off to the side for a tighter, more intimate angle.
I frame both before I touch the lights. Decide your composition, lock the headroom and the rule of thirds placement, and set your eyeline. Once the framing is locked, the lighting has a target to aim at. Doing it the other way around means you relight every time you nudge the camera, and that is how a 30 minute setup turns into two hours.
One light does most of the work
You do not need a three point kit to look professional. For a fast interview I lean on a single strong LED, like the Aputure 600D, as my key. I place it at about 45 degrees to the subject and a little above eye level, then feather it so the falloff lands naturally across the face. That one light, shaped well, beats four lights thrown up in a hurry.
If I have a spare minute, I will bounce a little fill on the shadow side or let the room do it for me. But the priority order is simple: get the key right first, because it is doing 80 percent of the look. Everything after that is polish, not foundation.
Audio is where fast setups go wrong
When people rush a setup, audio is the first thing that suffers, and bad audio is the fastest way to make an interview feel amateur. I run a wireless lav system, the DJI Mic 2, clipped on the subject as my primary source. It is fast to attach and gives me a clean, close signal without a boom op standing around.
I also like to capture a backup with a shotgun mic, such as the Sony ECM-B1M, so I am never relying on a single source. Then I do the step most people skip when they are in a hurry: I put on monitoring headphones and actually listen before we start. Thirty seconds of listening saves you from discovering a dead battery or a rustling lav in post.
- Clip the wireless lav high on the chest, away from clothing that rubs
- Run a second source so one failure does not kill the whole interview
- Monitor with closed back headphones before the first question
- Watch your levels so nothing is clipping on the loud moments
The takeaway: a system beats more gear
A fast, professional interview is not about owning the most expensive cameras. It is about running the same simple sequence every time: pick the spot, frame the cameras, set one good key light, then lock your audio and listen. When those steps live in muscle memory, you stop improvising and you walk out with footage that looks like it took all day.
Build the system once and it pays you back on every shoot. If you want to see the exact cameras, lights, and mics I reach for, take a look at my gear page.