For years I graded everything with a mouse and keyboard. It works, but it is slow, and worse than slow, it pulls you out of the picture. You end up clicking tiny sliders and typing numbers instead of actually looking at the image. So when I finally added a dedicated color panel to my DaVinci Resolve setup, the speed jump was real. I walk through it in the video above, and below I want to break down why this one accessory changed how I grade.
The short version: a color panel gives you physical knobs, wheels, and buttons mapped to the controls you use most. Instead of dragging one slider at a time, you can push lift, gamma, and gain all at once with both hands. That is where the speed comes from. It is not magic, it is just better ergonomics for a job that is all about small, constant adjustments.
If you have never used one, here is what it actually does and how I work with it day to day.
Why a Mouse Slows You Down
Color grading in Resolve is built around a handful of controls you touch over and over: the color wheels, the master wheels for lift, gamma, and gain, plus tweaks to saturation, contrast, and hue. With a mouse you can only move one of those at a time. You grab a wheel, nudge it, let go, grab the next one, nudge that, and repeat. Every clip. Every shot.
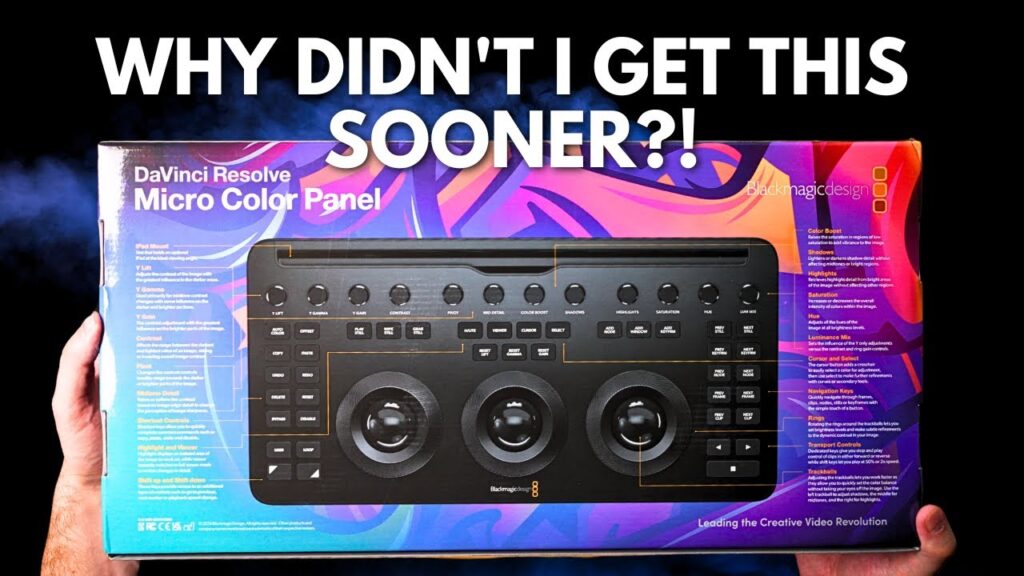
A color panel collapses all of that into one motion. The three trackballs sit under your fingers, and the rings around them control the master levels. You can warm up the shadows, lift the midtones, and pull back the highlights in a single pass without ever looking down at your keyboard. That is the difference between grading a shot in thirty seconds versus a couple of minutes.
What the Panel Controls Map To
Most color panels follow the same logic, so once you learn one the layout makes sense. Here are the main controls you will be reaching for:
- Trackballs for lift, gamma, and gain, which let you push color into the shadows, midtones, and highlights independently.
- The rings around each trackball, which raise or lower the brightness of those same ranges.
- Knobs for the global controls like contrast, pivot, saturation, hue, and luminance mix.
- Buttons to add a new node, copy a grade, or jump to the next clip without touching the mouse.
The big win is muscle memory. After a few sessions your hands know where everything is, and you stop thinking about the interface entirely. You just react to the image in front of you, which is the whole point.
How I Actually Grade With It
My process is pretty simple. I start by balancing the shot, getting the exposure and white balance neutral using the master rings and the gain trackball. Then I set my look on a second node, pushing the trackballs to taste. Because both hands are working at once, I can chase the feeling of the shot instead of building it one parameter at a time.
The other thing the panel speeds up is moving between clips. There are dedicated buttons to grab a grade from one shot and paste it onto the next, then fine tune from there. On a timeline with a lot of similar coverage, that copy-and-adjust loop is where most of your time goes, and doing it with buttons instead of menus adds up fast.
Do You Need the Biggest Panel?
No. The high-end panels with rows of knobs and multiple displays are built for full-time colorists working all day. For someone editing their own footage, the compact panels give you the three trackballs and the core controls, which covers the vast majority of what you do. Start there.
A few things to keep in mind before you buy:
- Check that the panel is supported in the version of Resolve you run, since some controls behave differently between the free and Studio versions.
- Make sure your desk has room for it within reach, because the value is having it always under your hands.
- Expect a short learning curve. The first session feels slower while you build the muscle memory, then it clicks.
The Takeaway
A color panel does not make you a better colorist on its own. Your eye still does the work. What it does is remove the friction between your eye and the image, so you spend your time looking and reacting instead of clicking. For me that meant grading went a lot faster and, honestly, became more fun. When the tool gets out of the way, you make better calls.
If you are setting up your own grading station and want to see the rest of what I run, take a look at my gear page, or head over to the blog for more DaVinci Resolve walkthroughs.